If you are working with our partner AscendTMS you will easily be able to export your data from them to us. In this article, I will walk you through a step-by-step process of how to export it.
Step-by-step instructions
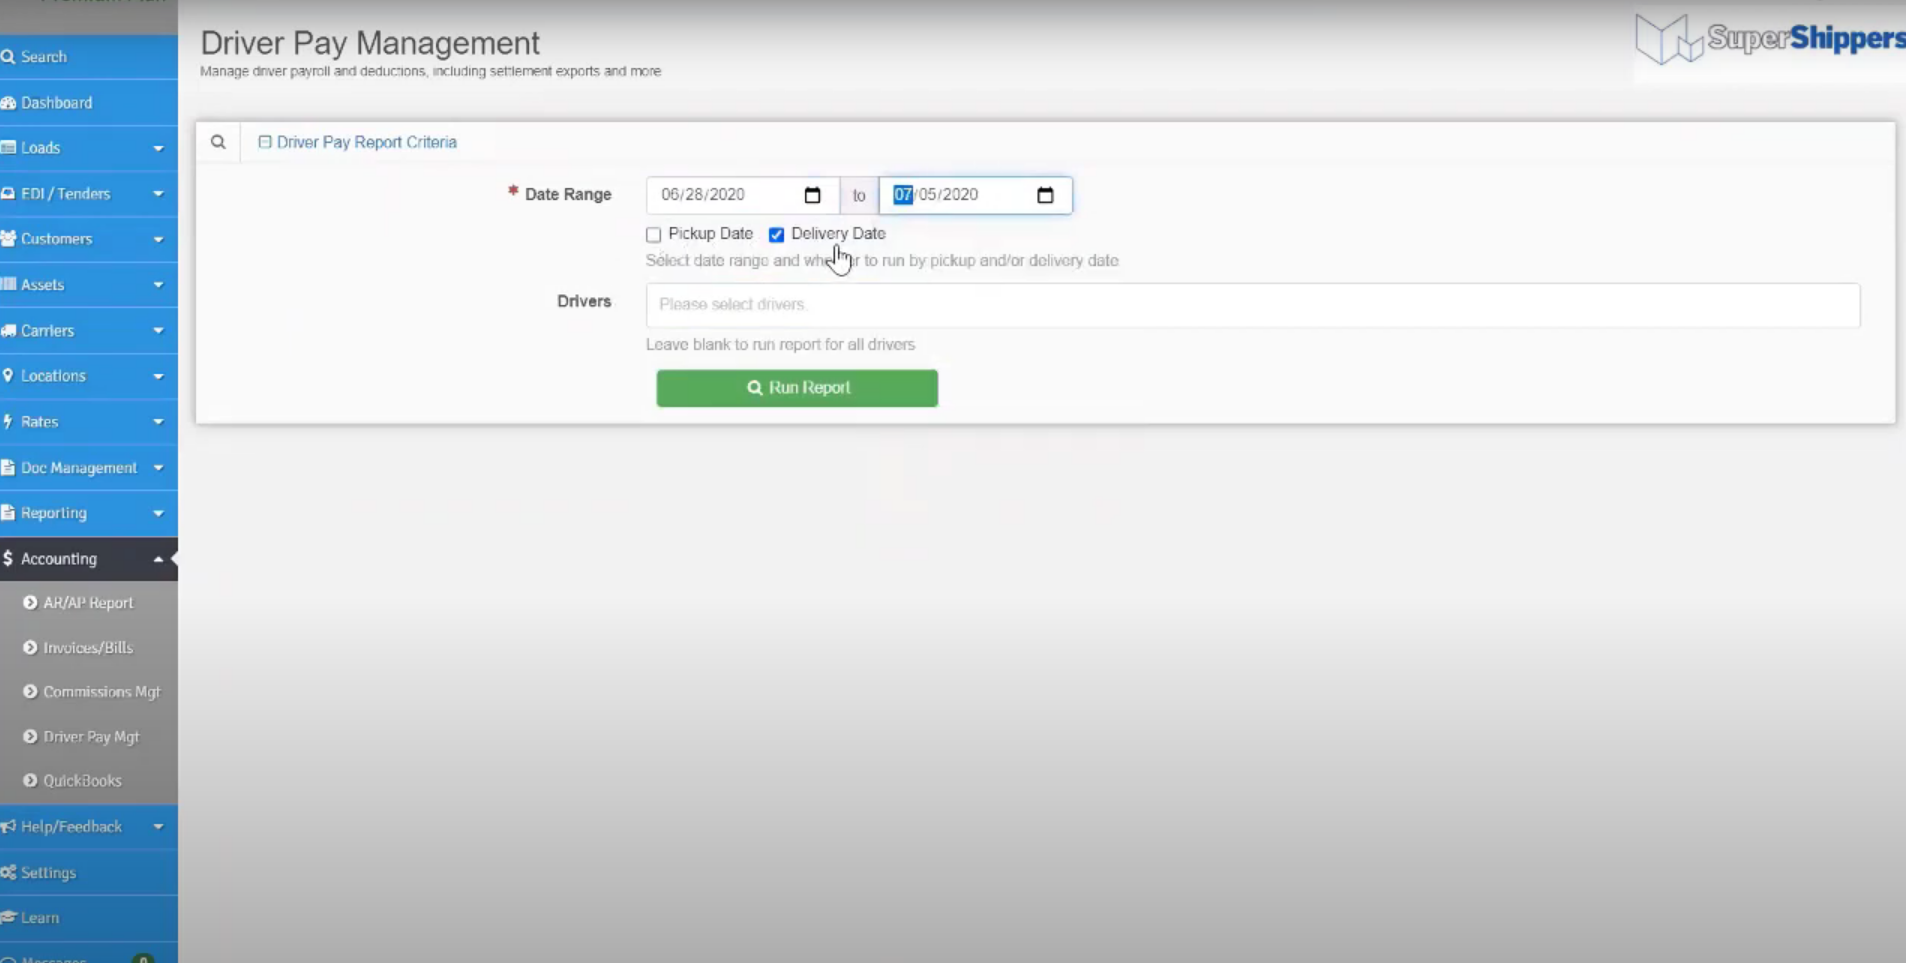
Step 1:
Go onto the AscendTMS website. Click on the “Accounting” dropdown menu and click on “Driver Pay.” This should take you to the Driver Pay management page. Next, put in your payroll date range. Then click on the “Pickup Date” box or the “Delivery Date” box, depending on what way you pay.
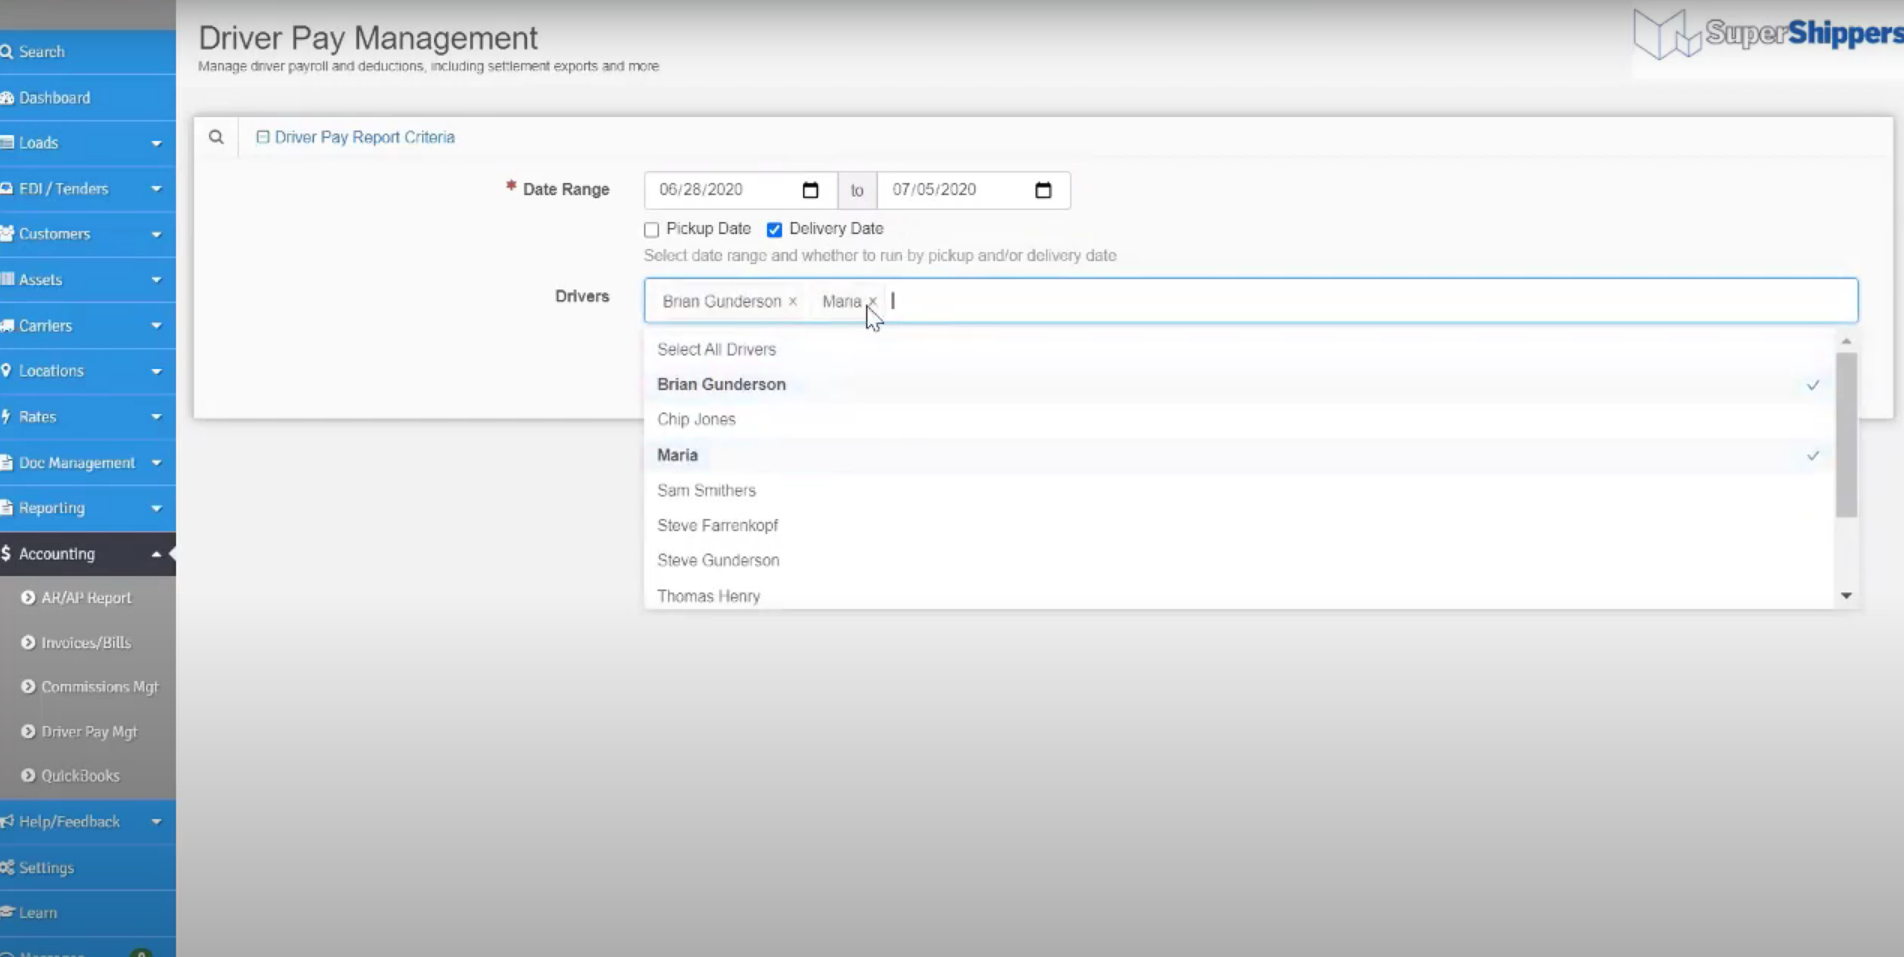
Step 2:
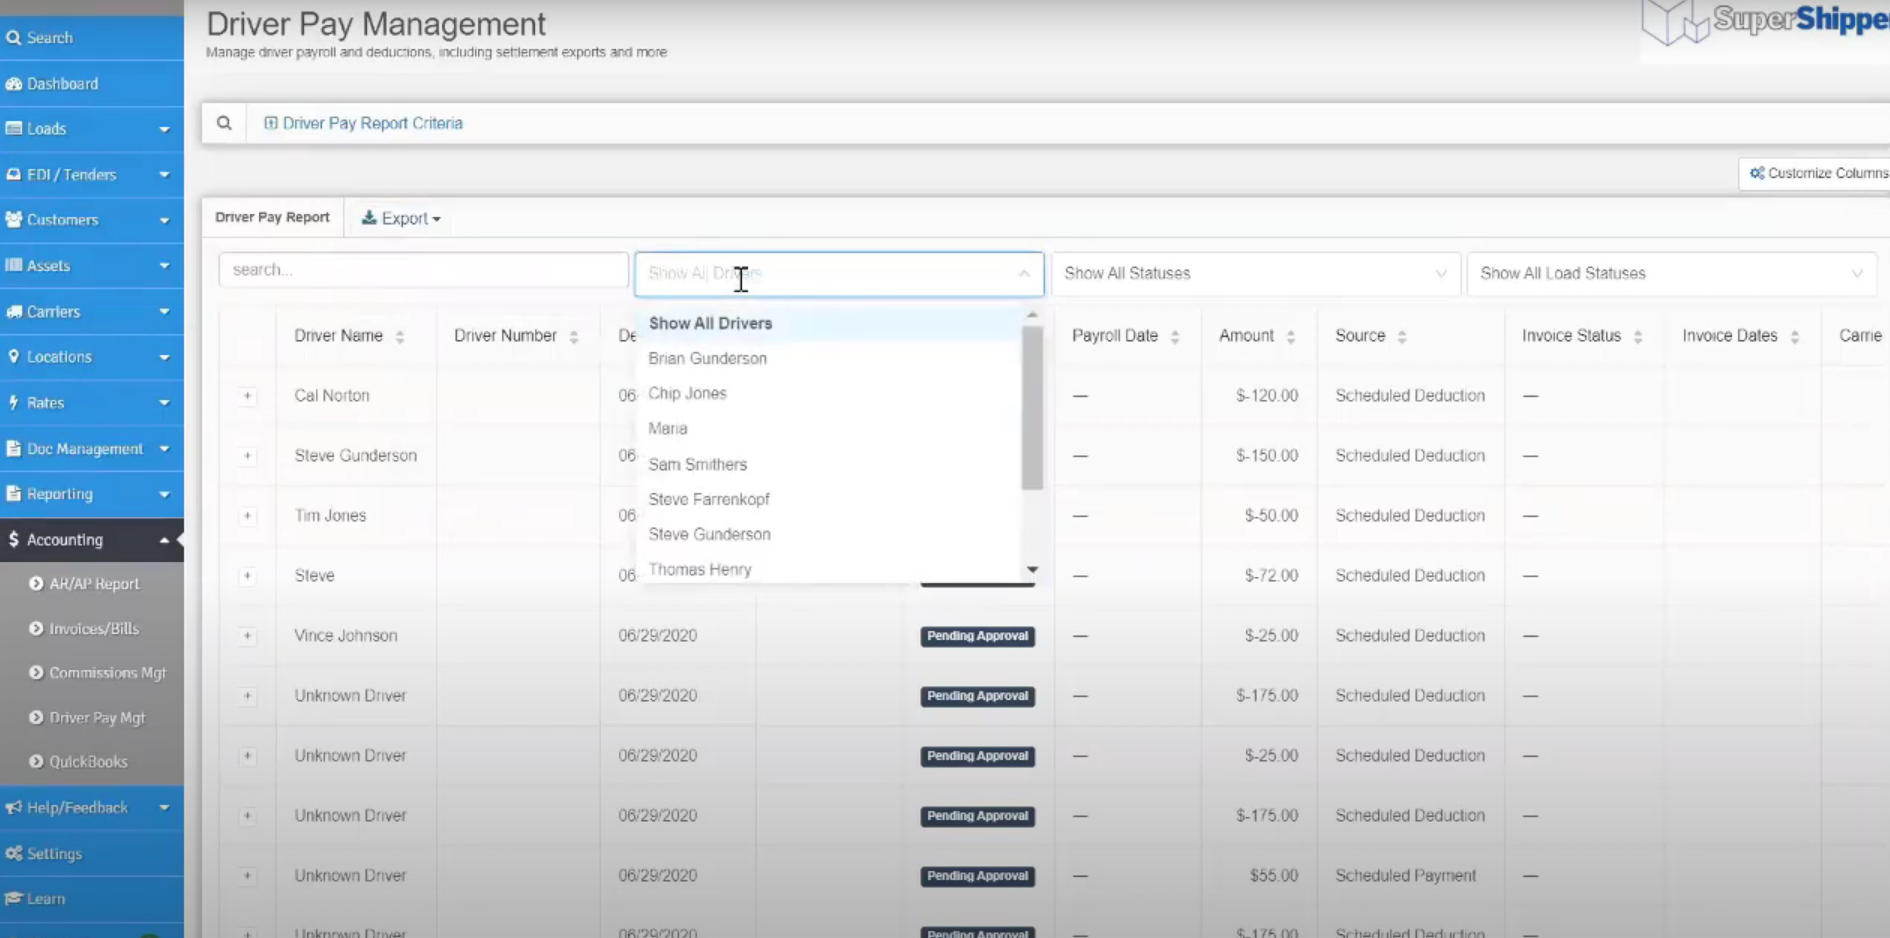
Secondly, click on the bar next to the word “Drivers.” This will give you the option to pick which drivers you are paying. You can select one driver, multiple drivers, or even select all of your drivers.
Step 3:
If you leave it blank, it will automatically select all of your drivers. This is recommended. This eliminates the need to go back and change out the drivers. It has the option to sort by the driver on this next page.
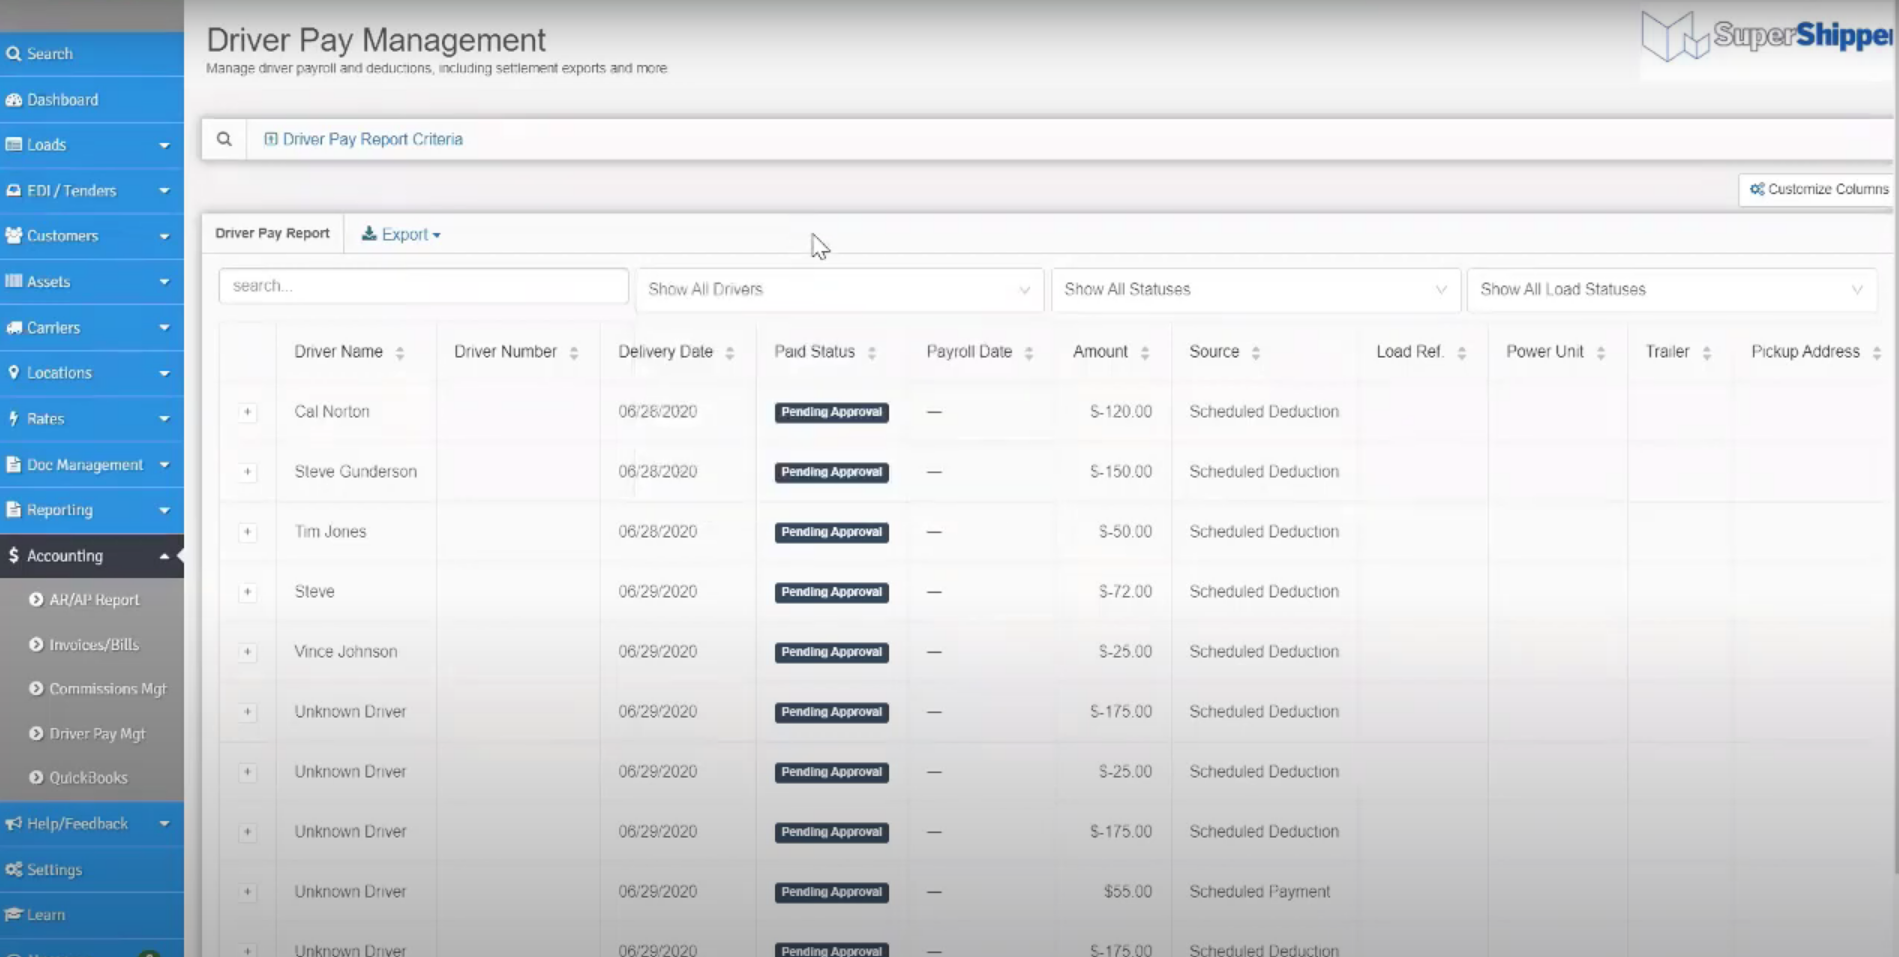
Step 4:
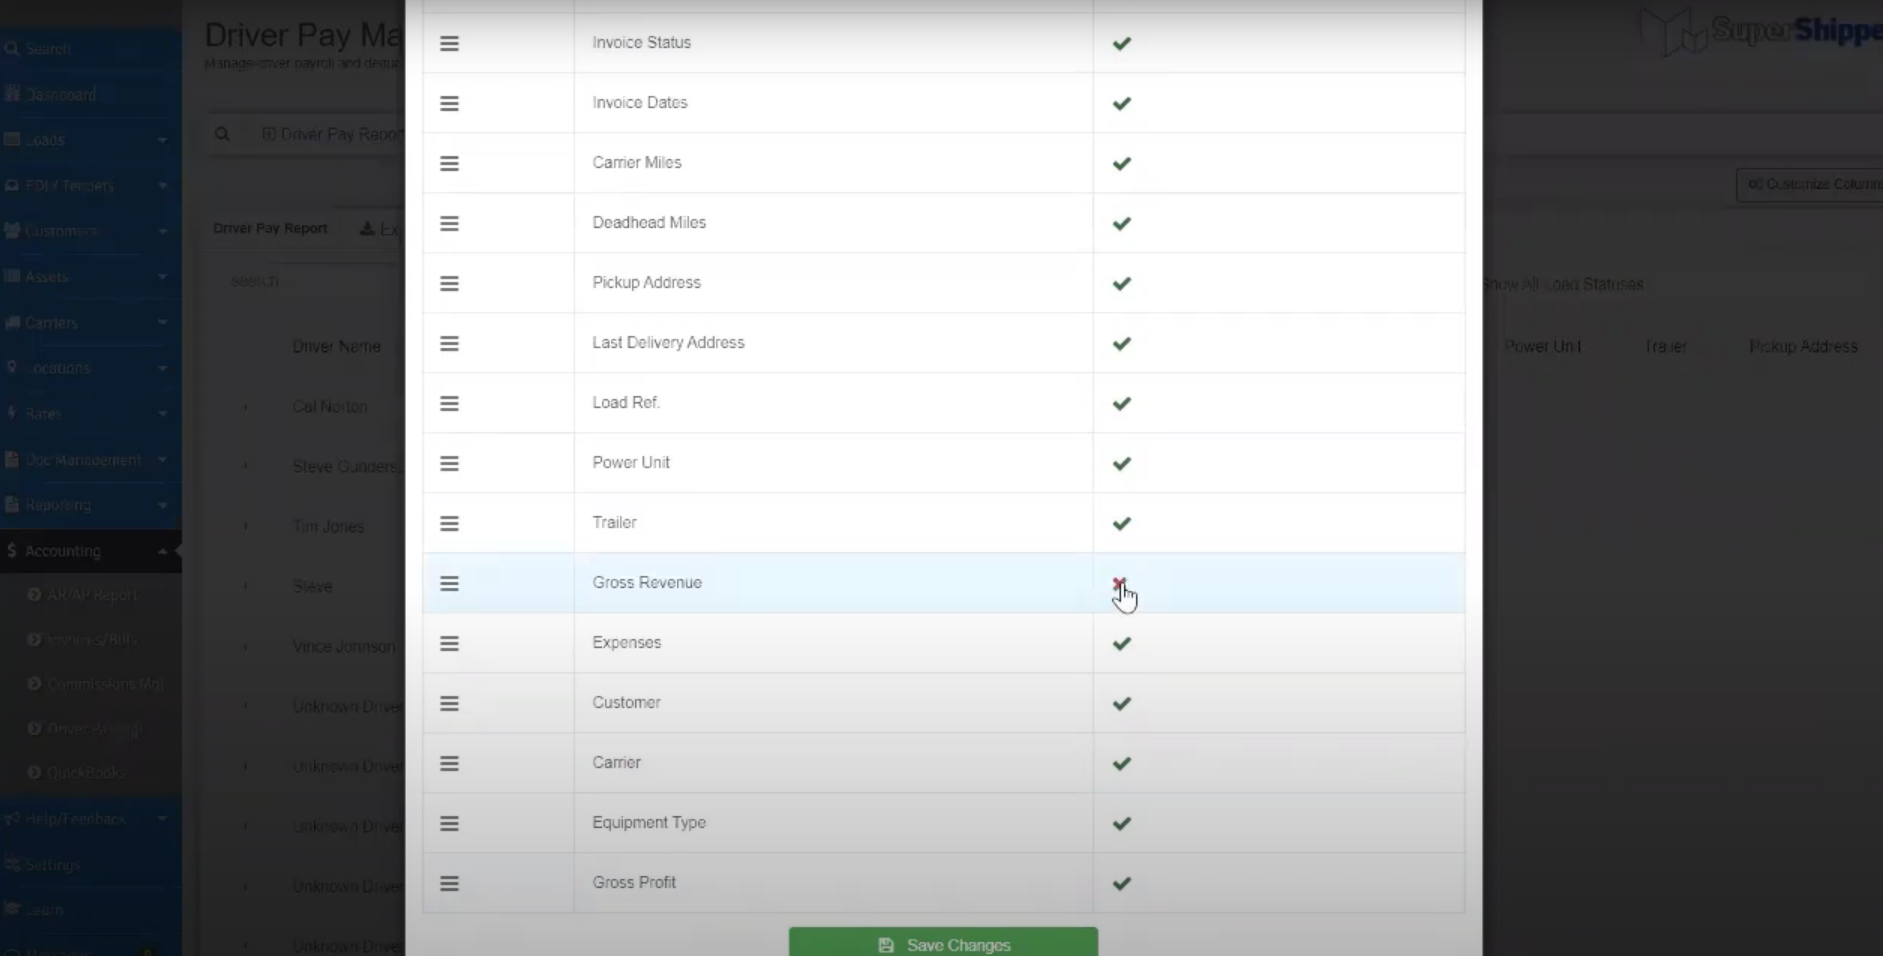
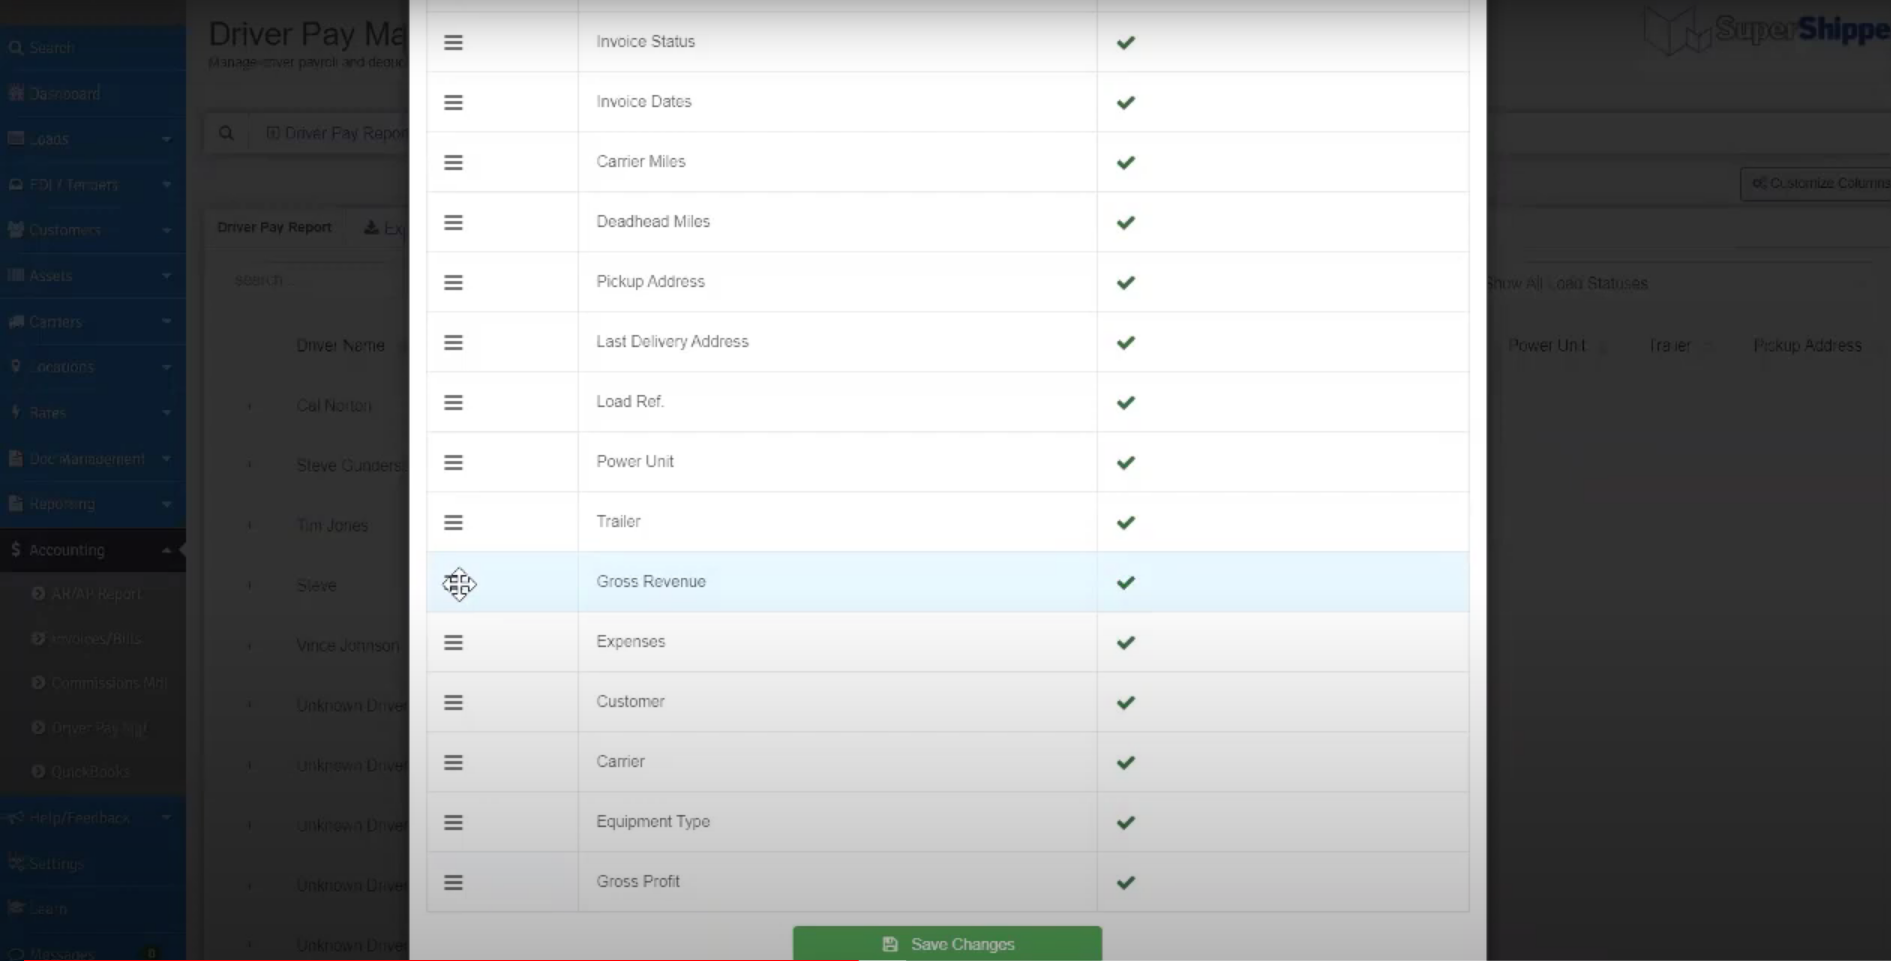
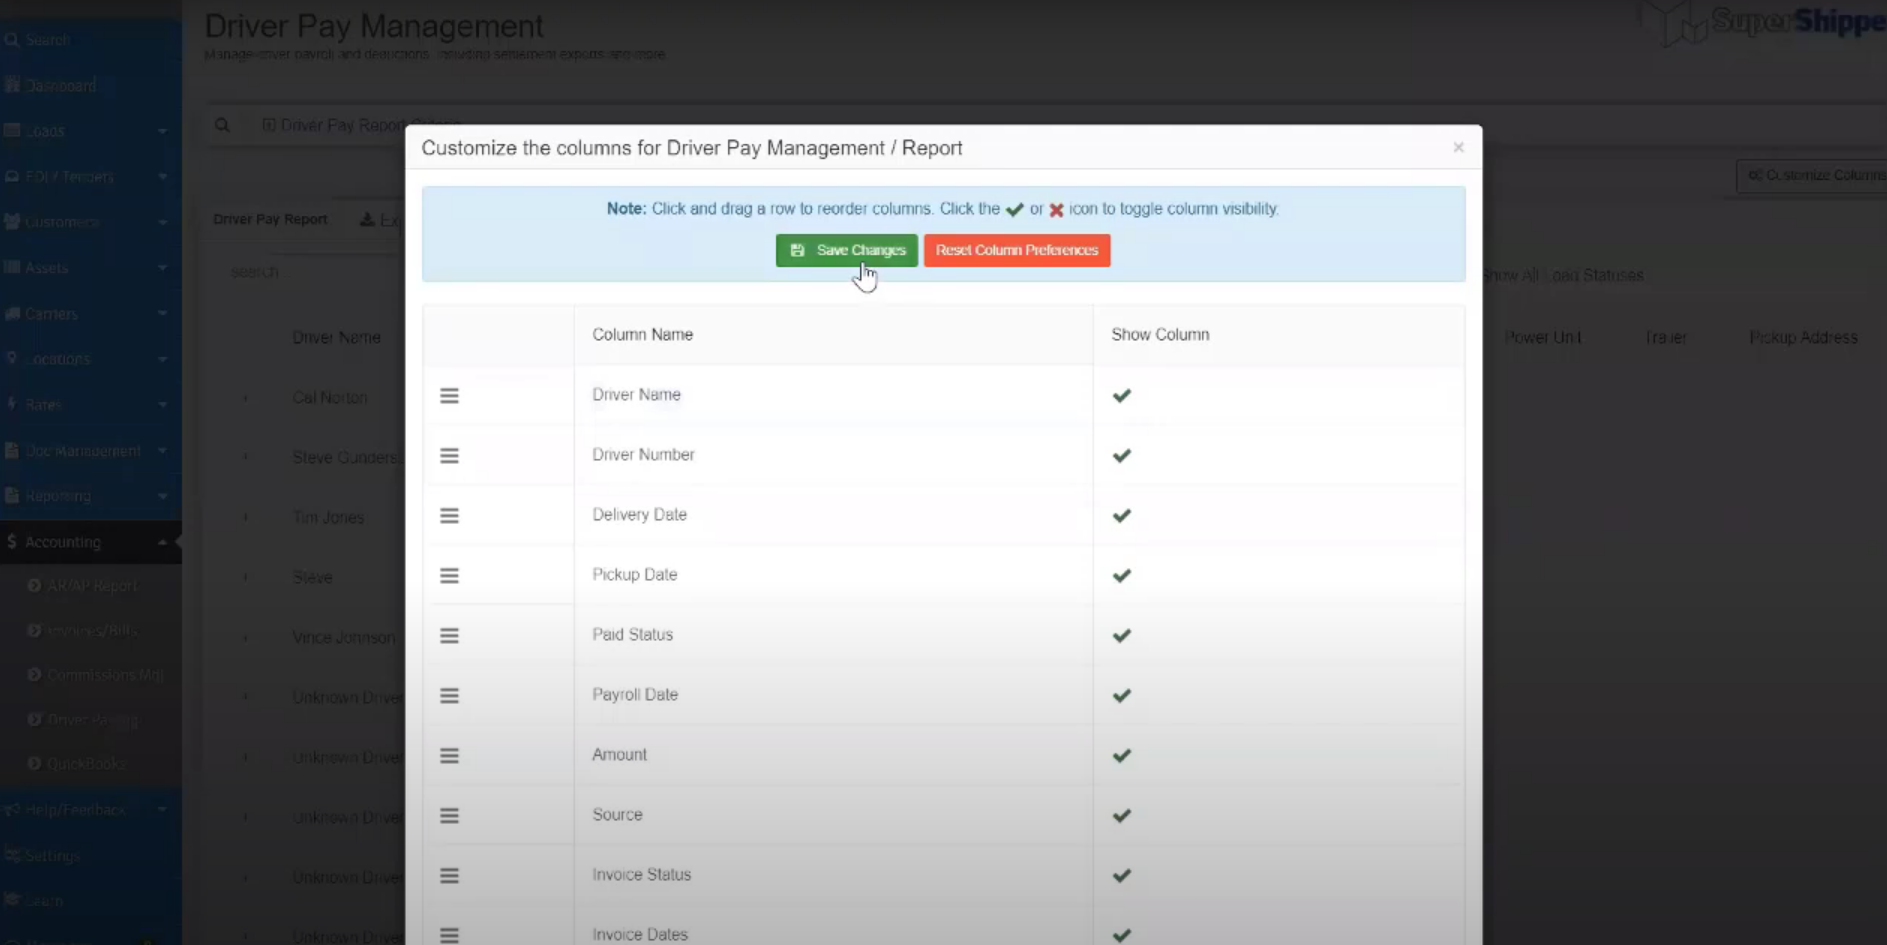
You can then customize your columns on the top of this page. If you click on the button in the right top corner, you can see a list of all the column names. The green check means that you do want to see that column. If you click on the green check, it will change it to a red “x.” This means that you don’t want to see that column.
Step 5:
If you click and hold the 3 lines on the side, you can drag and drop the columns. You can drag the name up or down. This will let you be able to see that column’s name closer to the left side of the screen. This will bring the columns that you want to see right to the forefront. Then you won’t need to scroll to the right.
Step 6:
After your columns are in the right order and you clicked on the ones that you want to see, you can click on “Save Changes.” This will bring you back to the page with the columns.
Step 7:
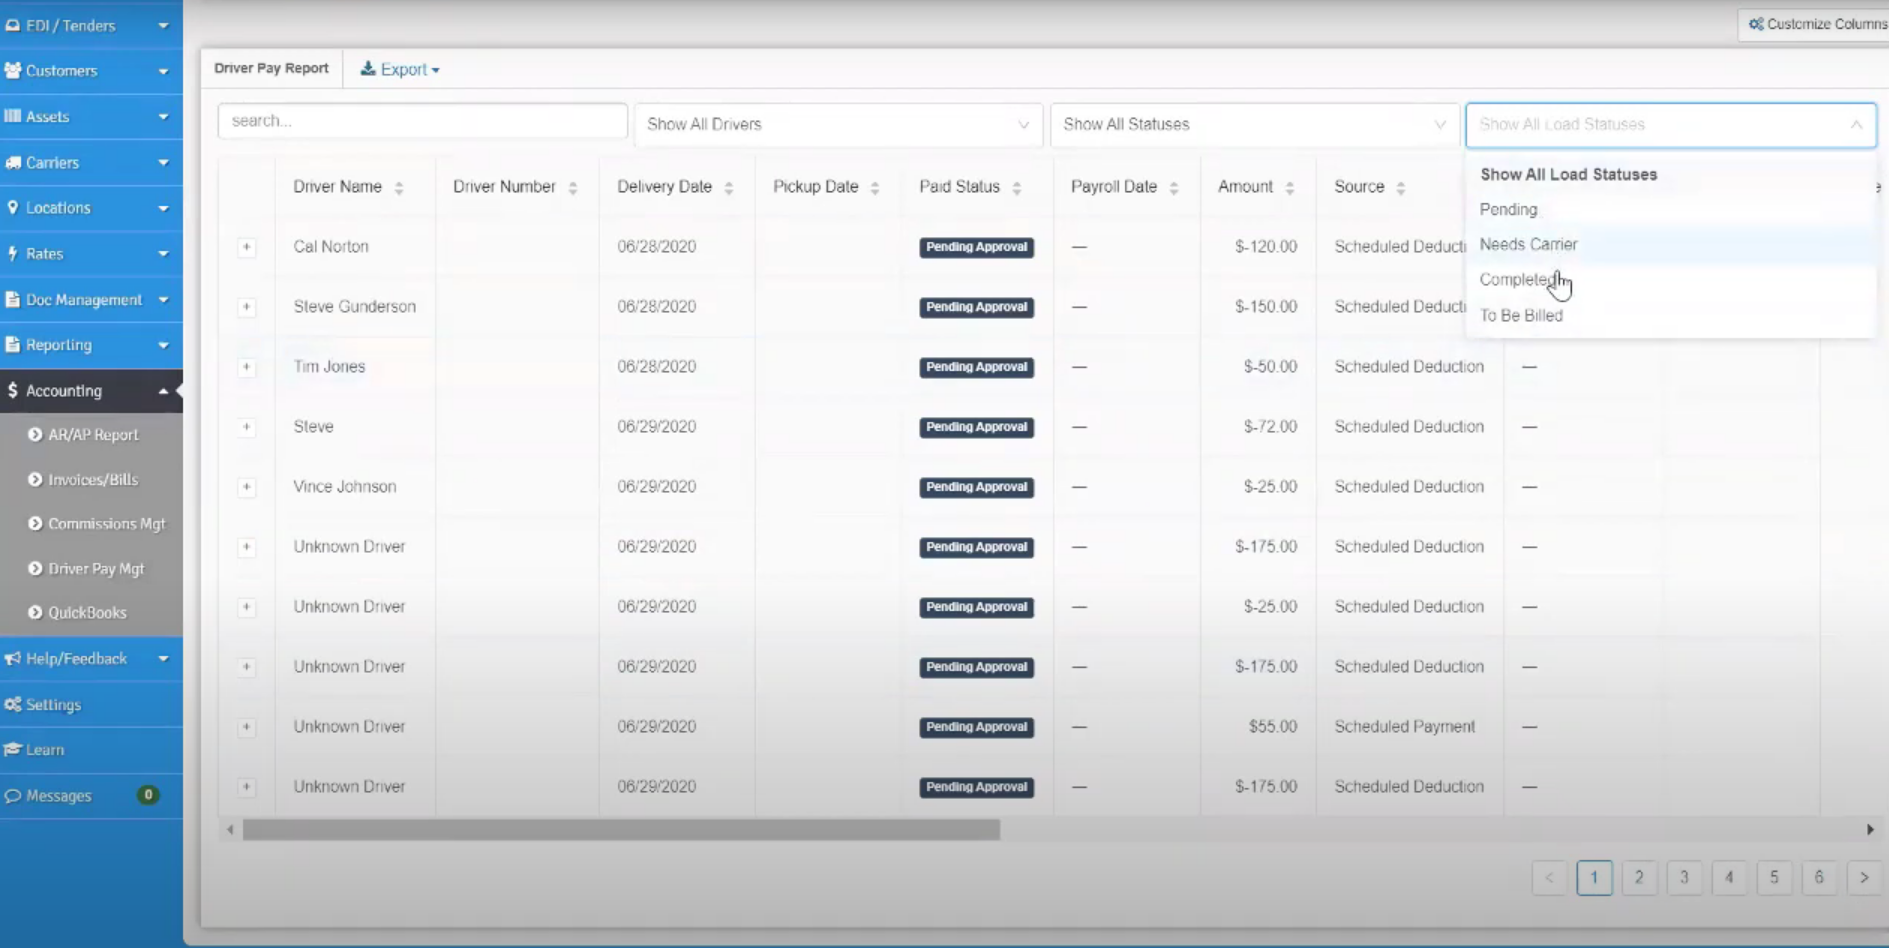
Another thing that you can use on this page that would be helpful would be the drop-down bars at the top. These drop-down bars can help you sort by letting you “show all load statuses,” “show all statuses,” or “show all drivers.” There is also a search bar that would be very useful for sorting.
Step 8:
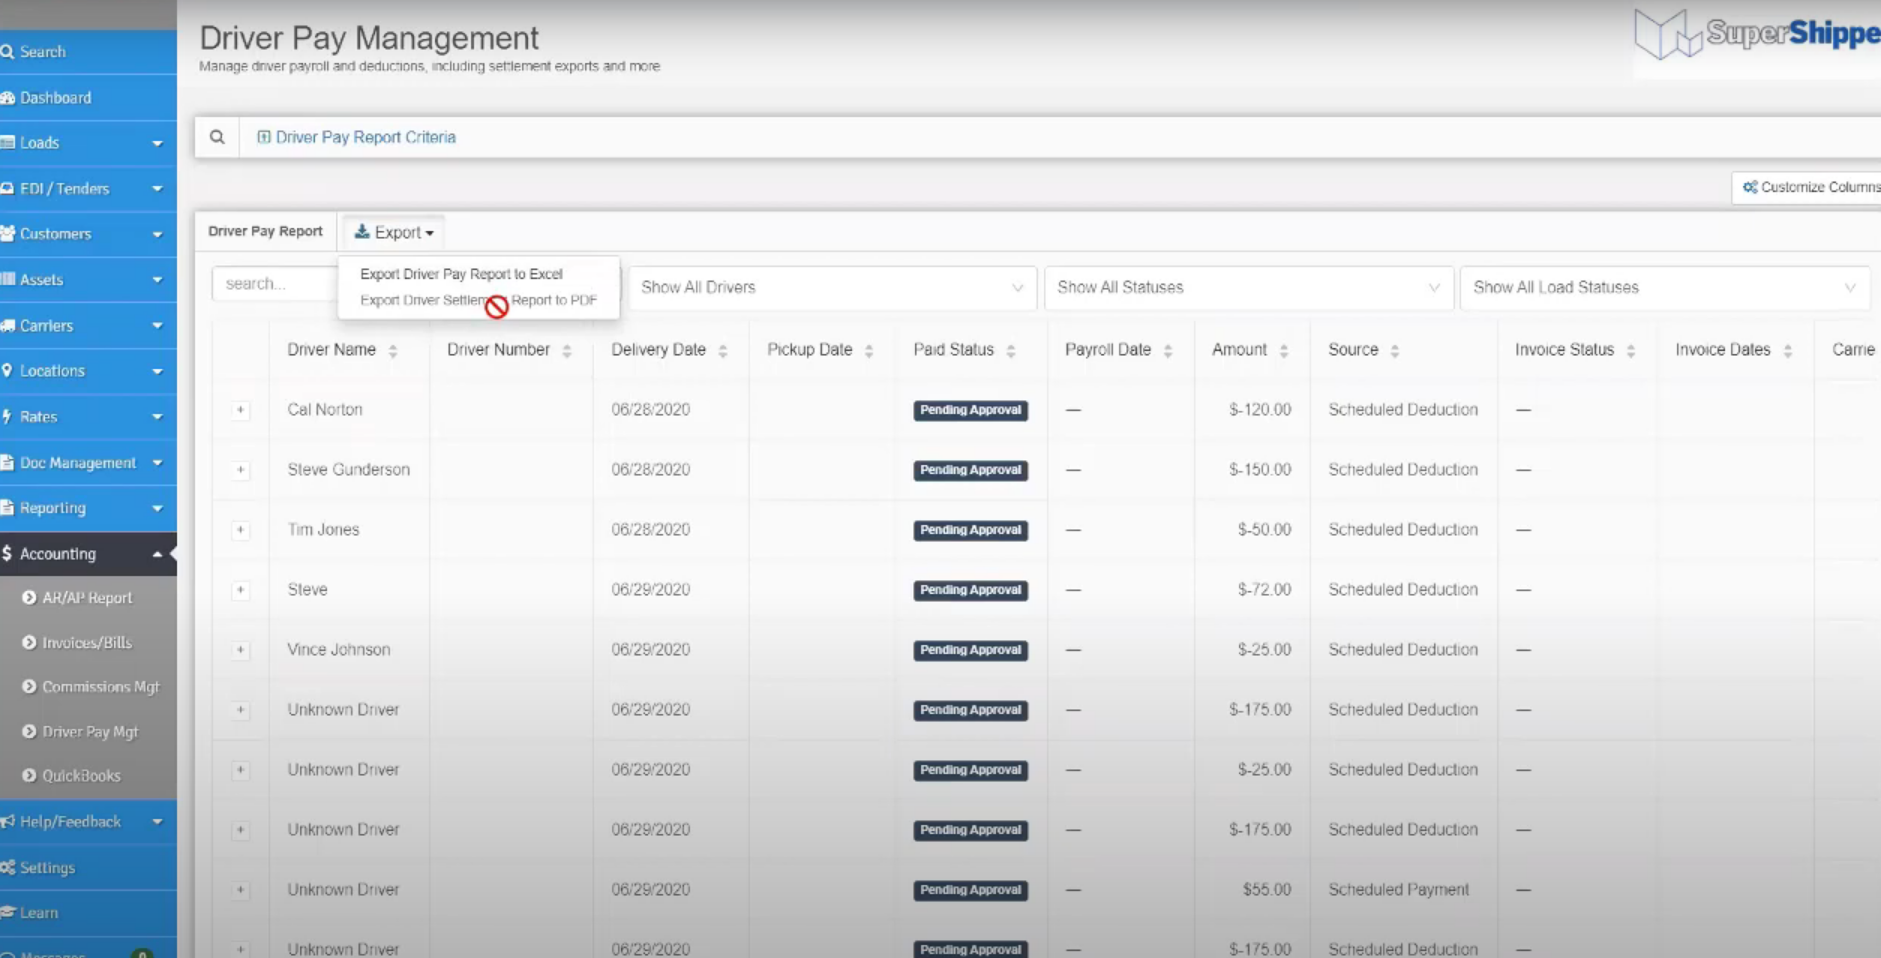
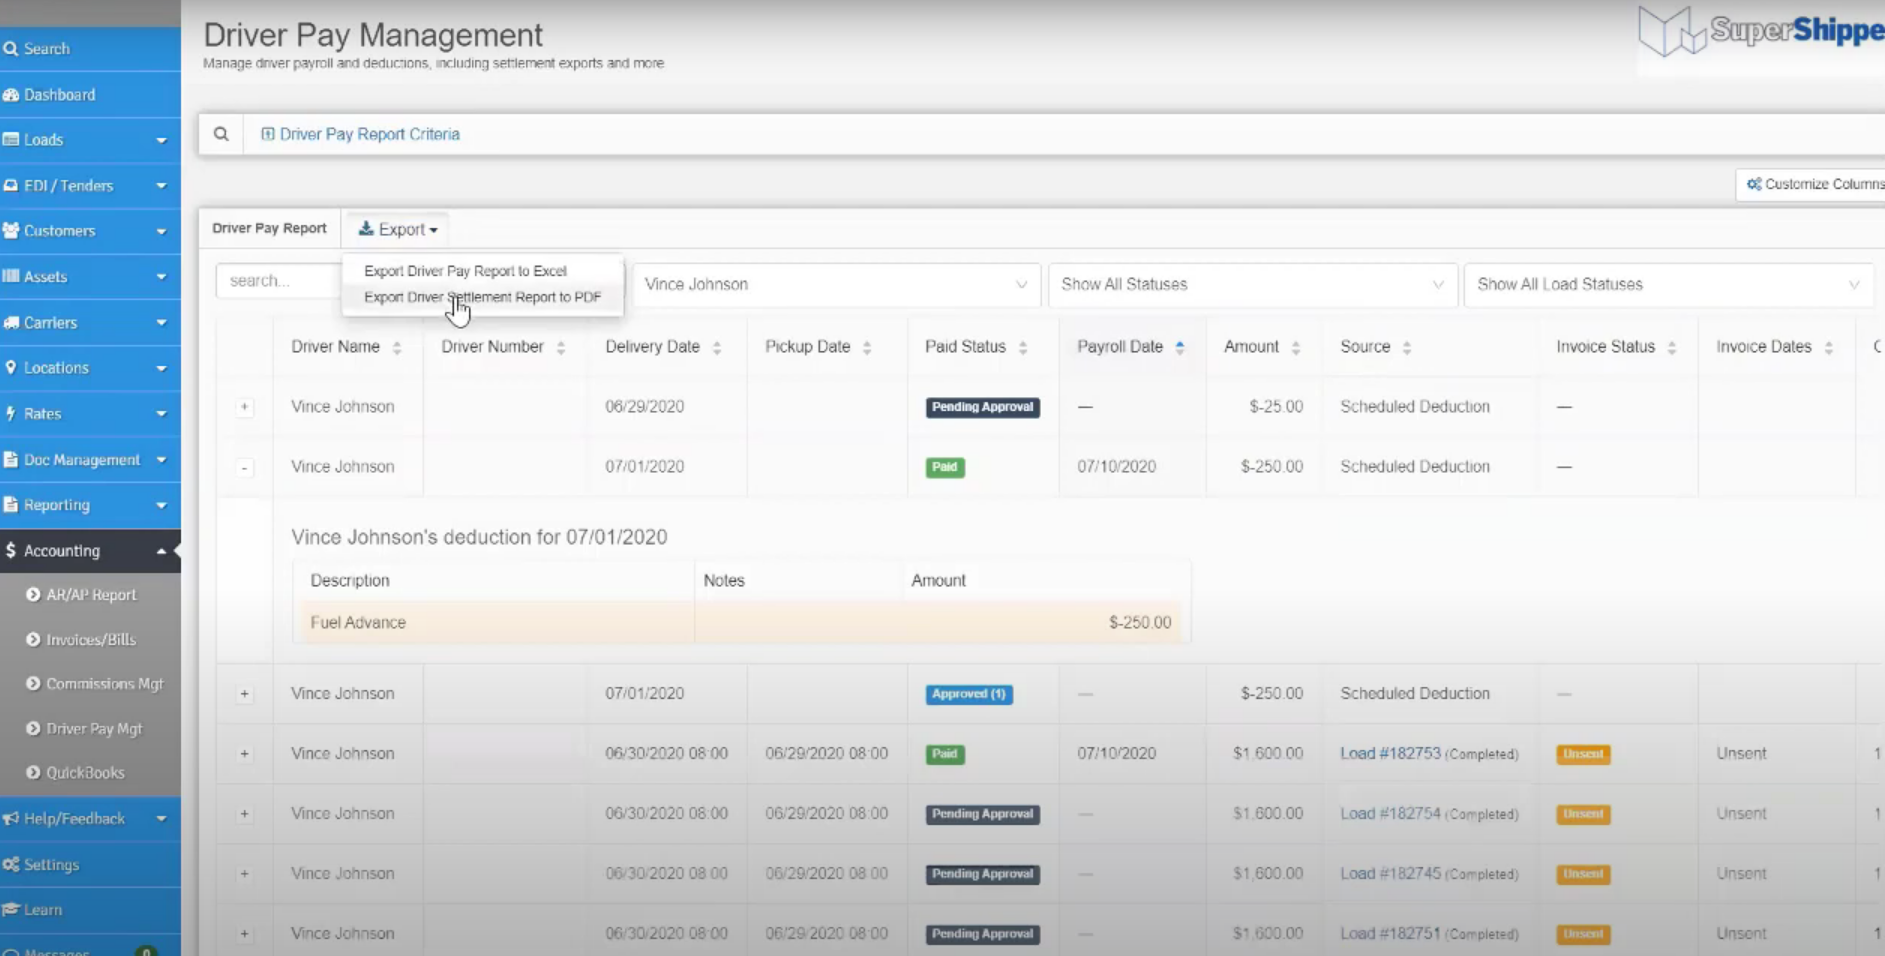
There is an option to export. You can export this data to excel for yourself to use internally for whatever you would like. If you are trying to export but your mouse turns to a red circle with a cross through it, it means that you need to be in “single driver mode.”
Step 9:
To be in single driver mode, click on the “show all drivers” bar and then select the driver you would like to look at.
Step 10:
It will then take you to that single driver’s page. Then you will have the option to export it. If you are trying to export it but you get an error saying that there are “no paid items found to export,” then it means that you can only export once you make the paid status say “paid.”
Step 11:
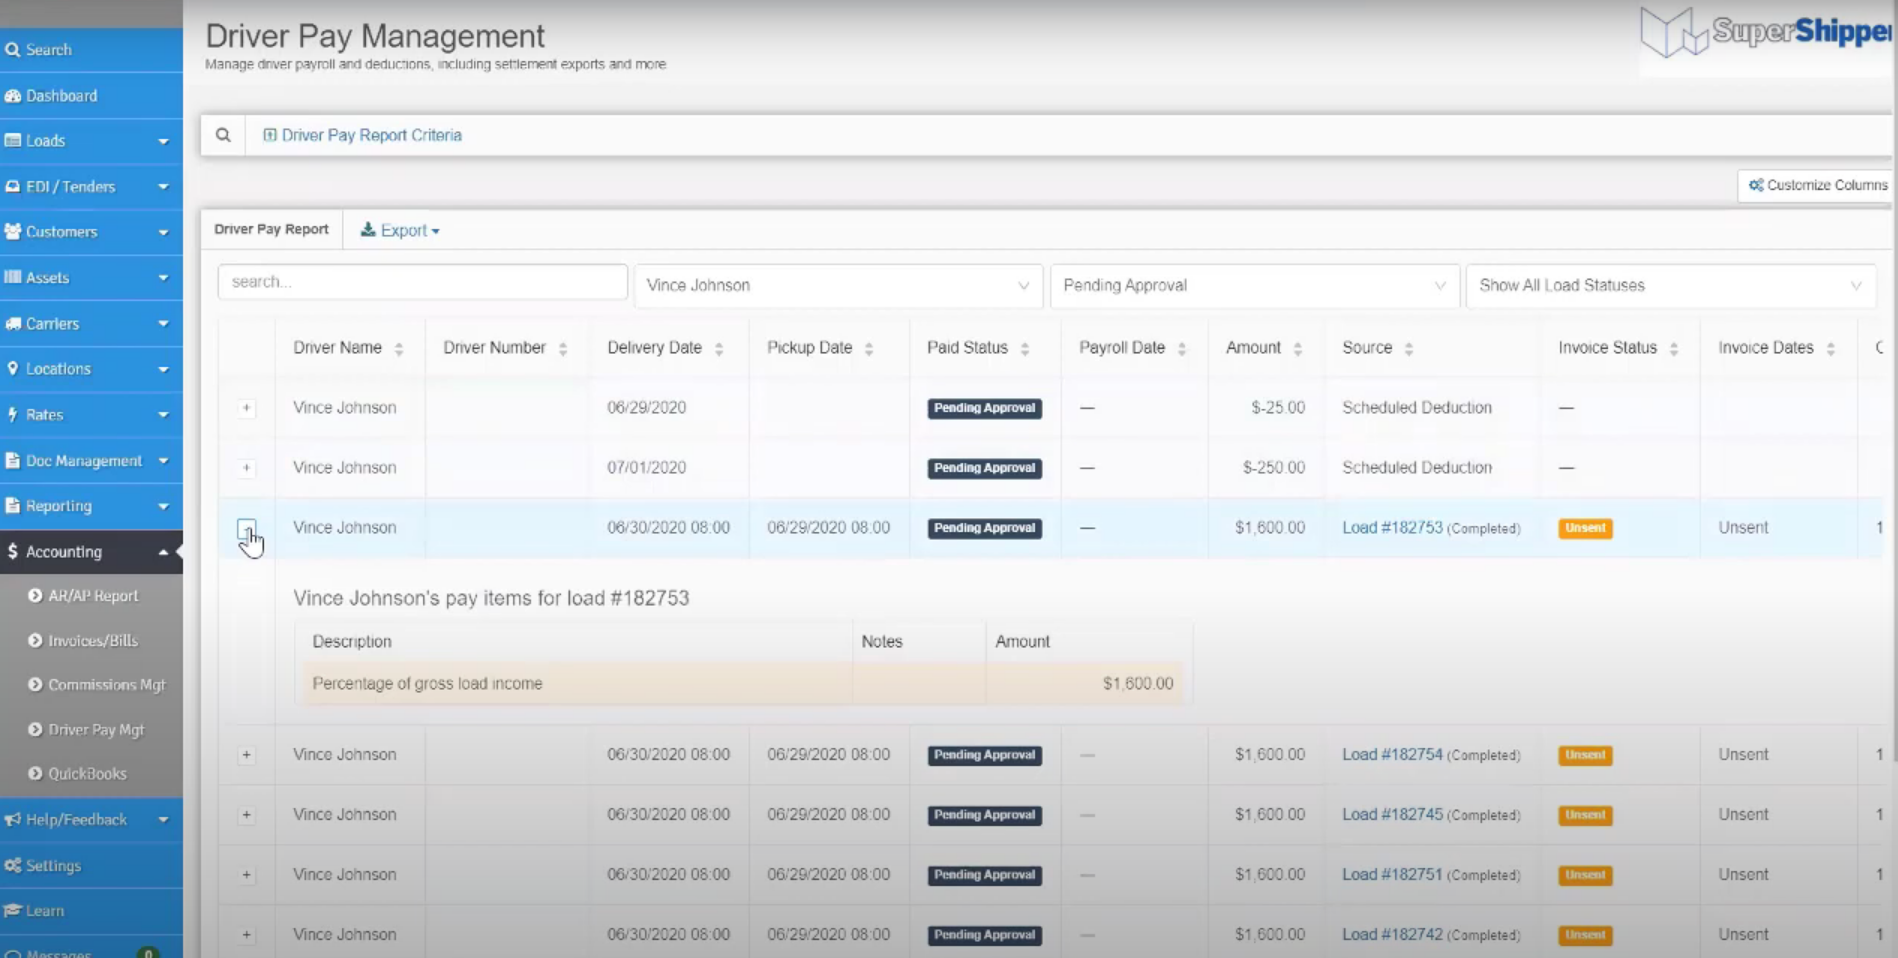
If you want to change the “paid status,” you should click on the plus sign expander (+) that is all the way to the left. When it expands, it will show more information about that specific pay item. If the load says that it is completed then you will know that that information is correct. That will come in handy when you want to see what a specific deduction is for.
Step 12:
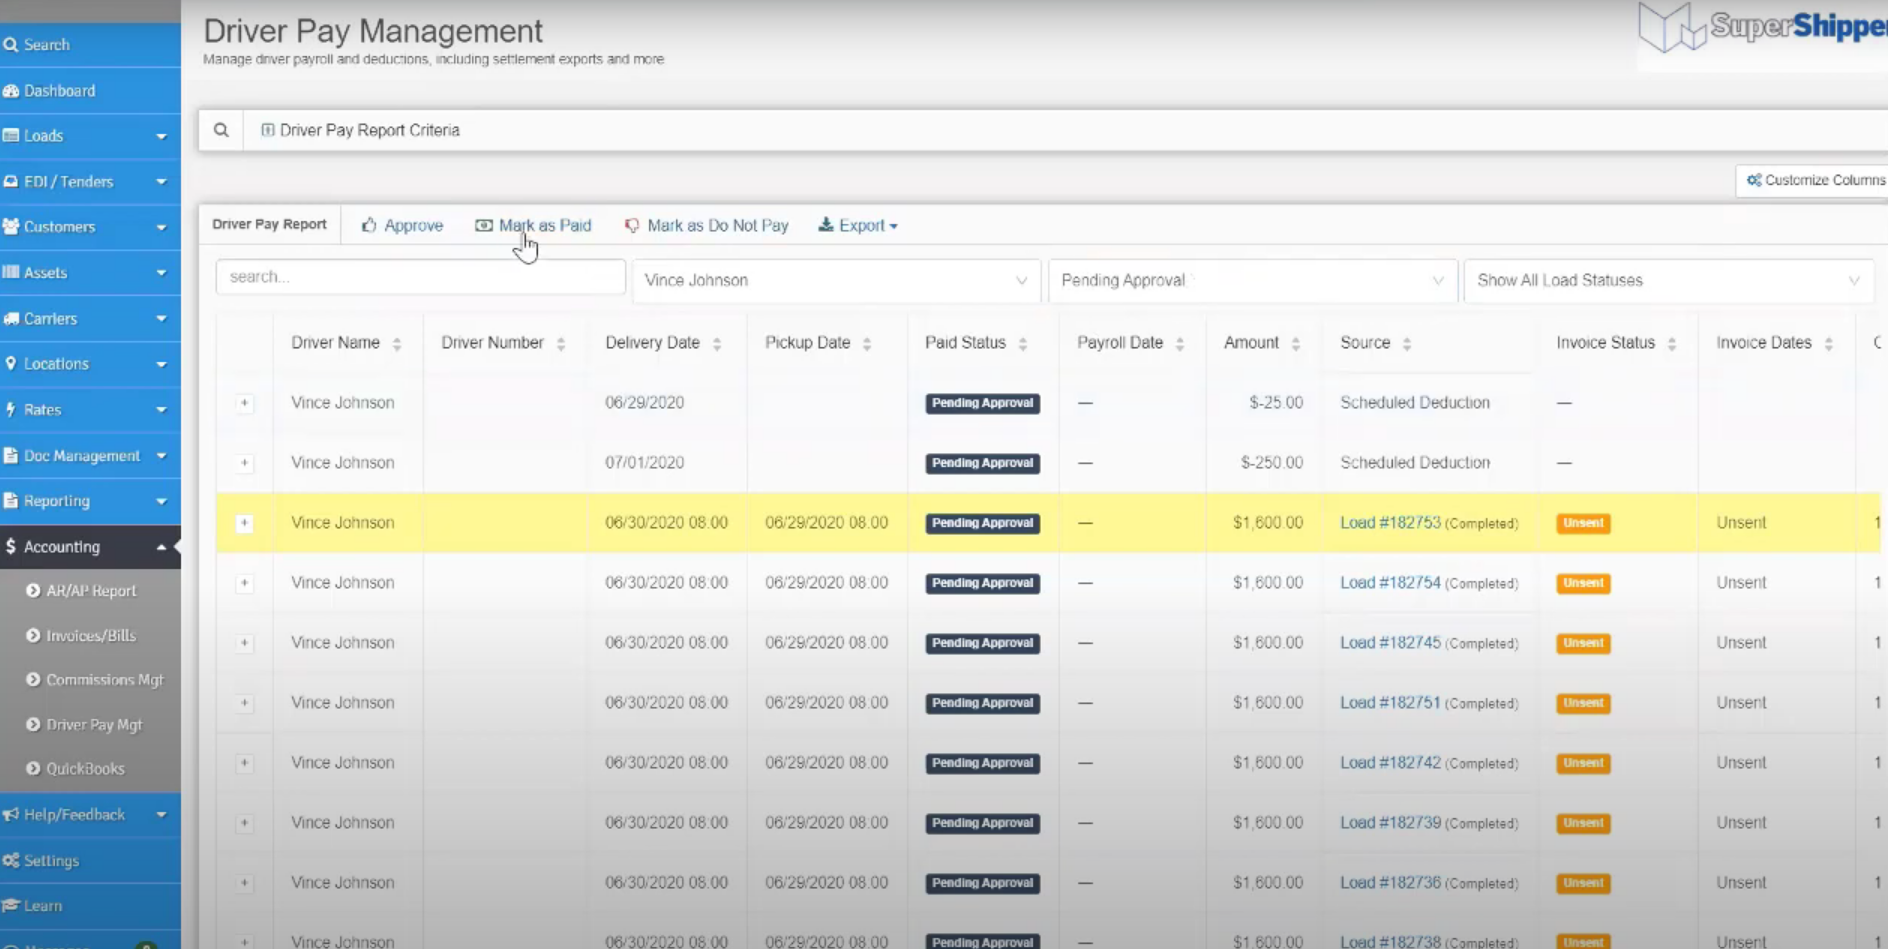
Now that we know that it is correct and we know what deductions are for, we can now move forward to get the settlement documents. We need to make the paid status say “paid.” To do this click anywhere on that specific driver load row and it will highlight it yellow. This will also show some options at the top such as “Approve,” “Mark as Paid,” and “Mark as Do Not Pay.”
Step 13:
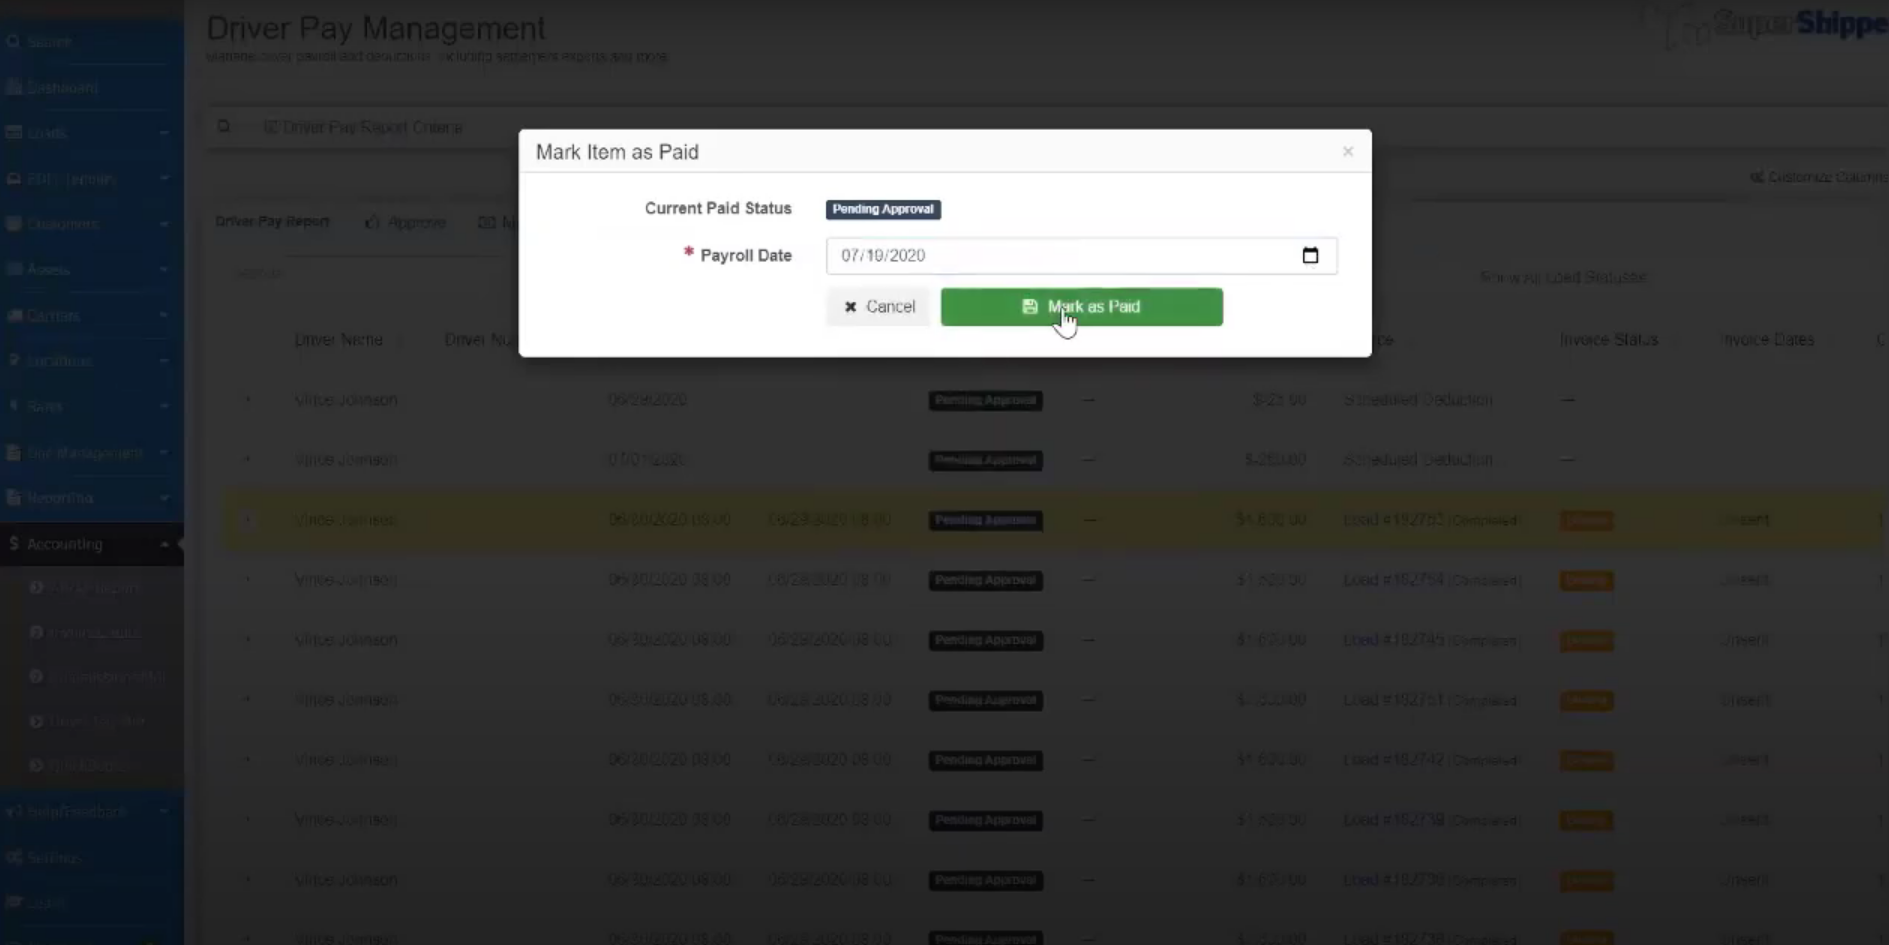
To move forward, we would like to click on “Mark as Paid.” When you click on this button, insert the date that you want it to be paid/payroll date. Then click on “Mark as Paid.” Since the system will only export items that are marked as paid, you must mark the deductions as paid as well.
Step 14:
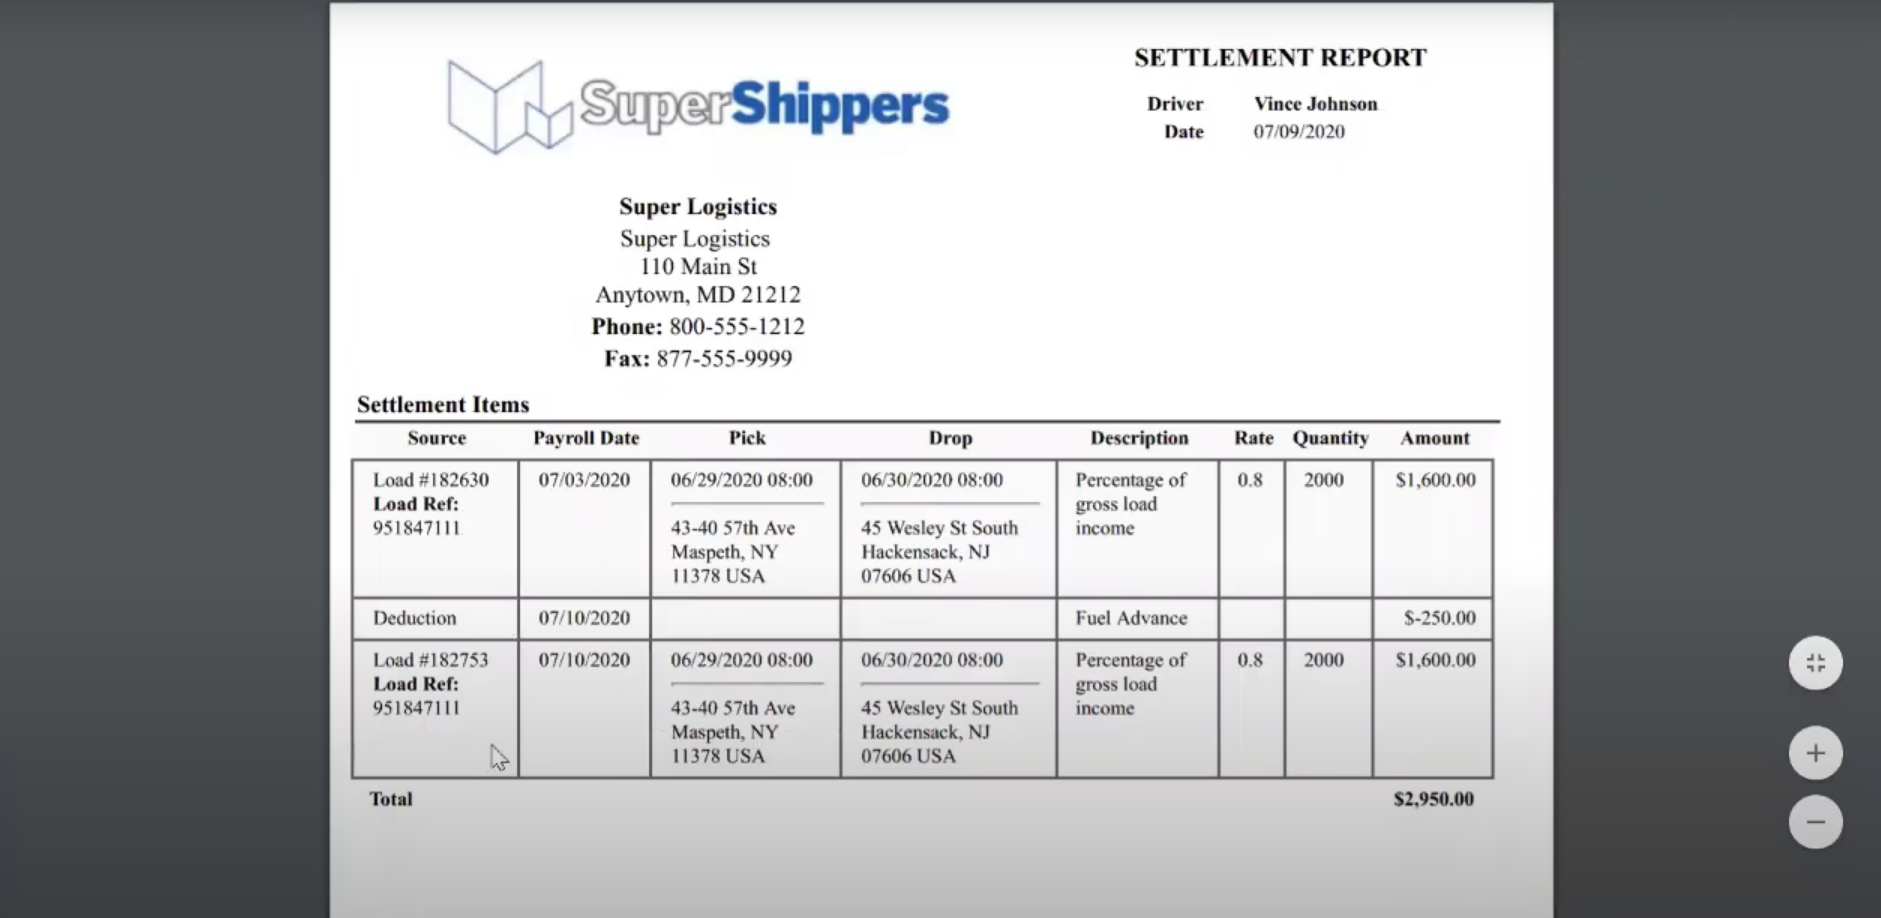
Once you have finished marking all of the loads and deductions that you need on the settlement as “paid,” you may click the export button. If you are sending your information to us to do your payroll, make sure that you click on “export as an Excel sheet” not a PDF.
Step 15:
This is what it will look like if you download it as a PDF. Download it as an excel spreadsheet of the settlement so you can send it to us to process your payroll. This settlement shows you all of the loads and deductions and a description of each of them so the drivers will know exactly what that amount is for, so you won’t have any questions later.
Step 16:
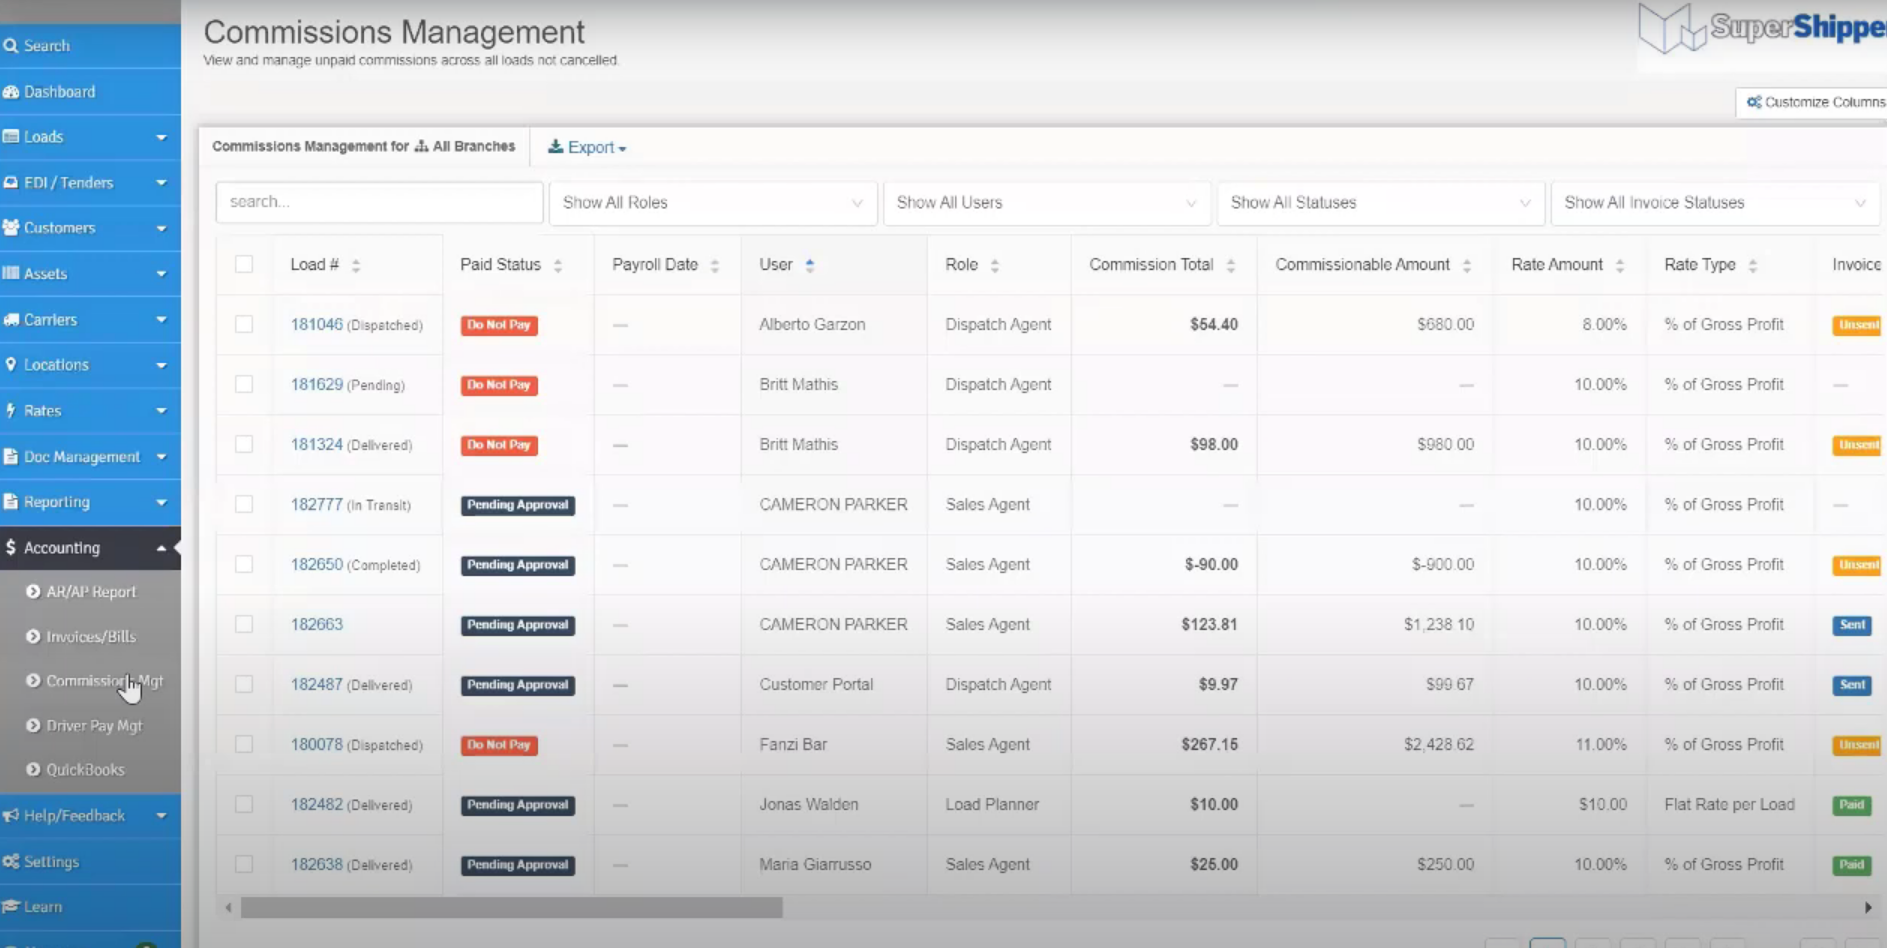
If you need to pay workers in the “Commissions Mgt,” go through the same steps as you did in “Driver Pay Mgt” to get the exported excel spreadsheet settlement.
Extra Questions:
If you still have questions or are confused about AscendTMS, you can watch their step-by-step video, or contact them through their website. In this video, they export the PDF version of the settlement. Don’t do that if you are processing payroll with Superior Trucking Payroll Service. Export as an Excel spreadsheet. If you are not using us as your payroll service and you want to join, go to our website and request a quote.
Tessa joined Superior Trucking Payroll Service in September 2022. She loves to write and make videos which made her a great asset to the team in her marketing position.
Before working at Superior Trucking Payroll Service she worked in IT at GVSU which gave her the skills to problem-solve with customers over the phone.